![]()

This tutorial will teach you how to create a pyjama or jogging pants.
Go on top of the screen to 'File > Save' and save the document. Write on a piece of paper (or your mobile phone note app) at which step you stopped. This prevents having to puzzle the next time you continue with this tutorial.
Step 1: Go to file > New.
Fill in:
For a better view:
Go to 'View' and check if 'Smart Guides' is active. If not, click on it to activate (ctrl-u). This will give you more control.
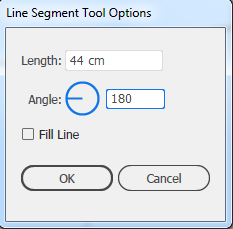
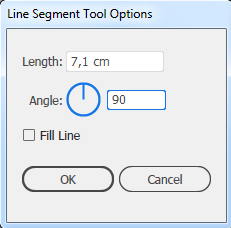
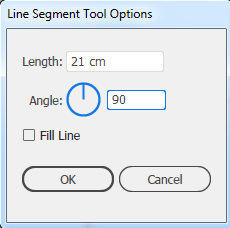
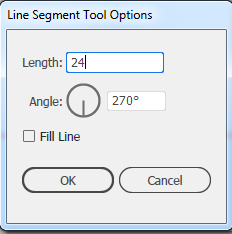
Step 2: Activate the 'Line Segment Tool'  (/).
(/).
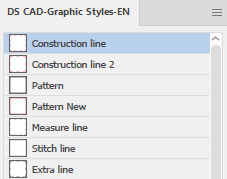 Step 3: Click in the panel called 'DS CAD-Graphic Styles-EN' on 'Construction line'.
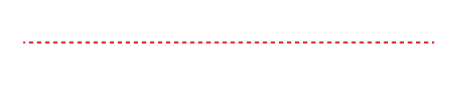
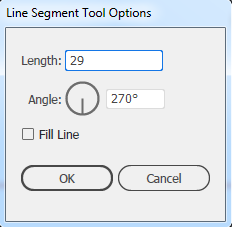
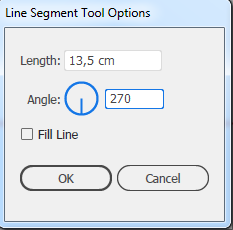
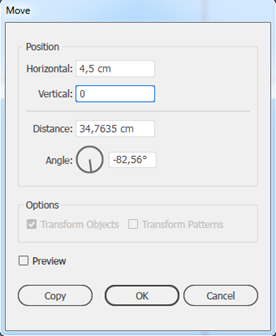
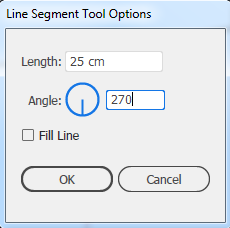
 Step 4: Click right from the center of the artboard and fill in:
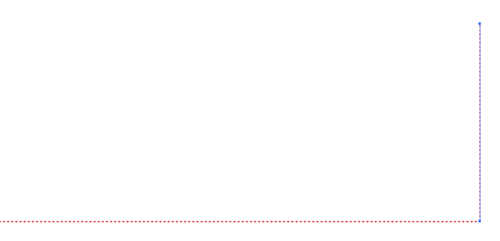
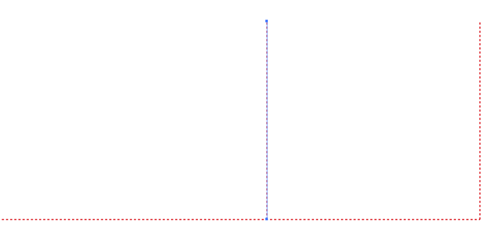
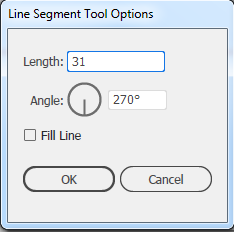
 Step 5: Click on the left anchor point of the horizontal construction line and fill in:

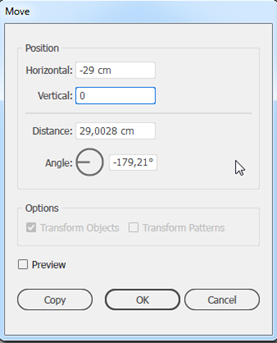
 Step 6: Click on the left anchor point of the horizontal construction line and fill in:

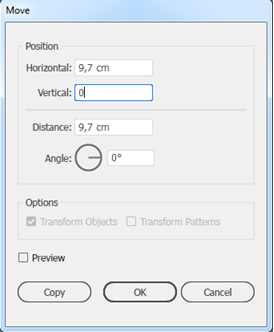
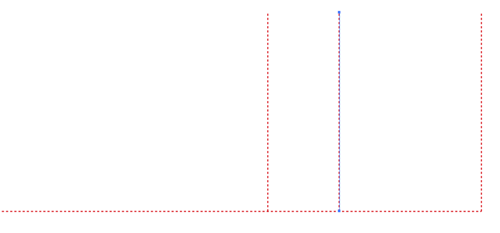
 Stap 7: Click on the right anchor point of the horizontal construction line and fill in:
 Step 8: Activate the "Group Selection Tool"
(Q), press 'Enter' and fill in:
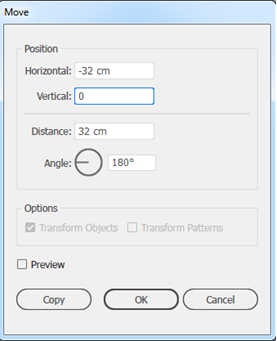
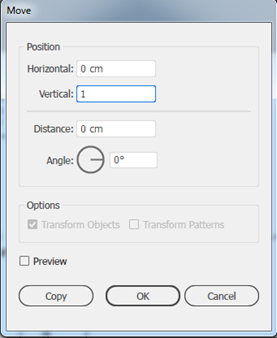
 Step 9: Press 'Enter' and fill in:
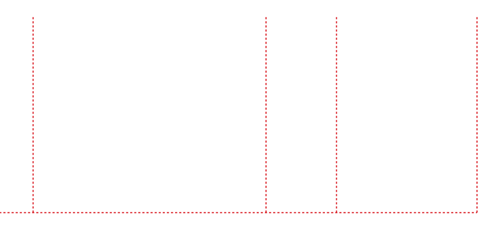
 Step 10: Click on the left vertcial construction line to select it, press 'Enter' and fill in:
Step 11: Activate the 'Line Segment Tool' (/).
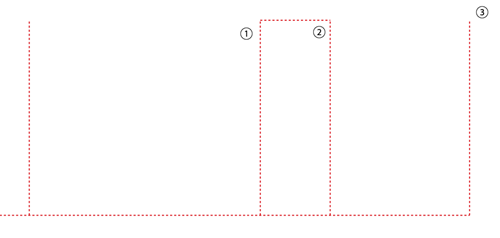
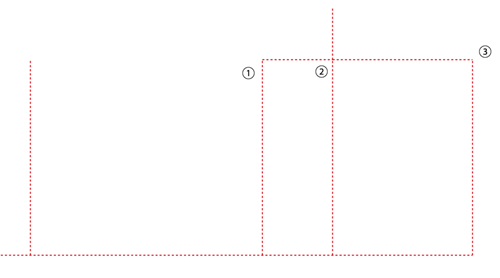
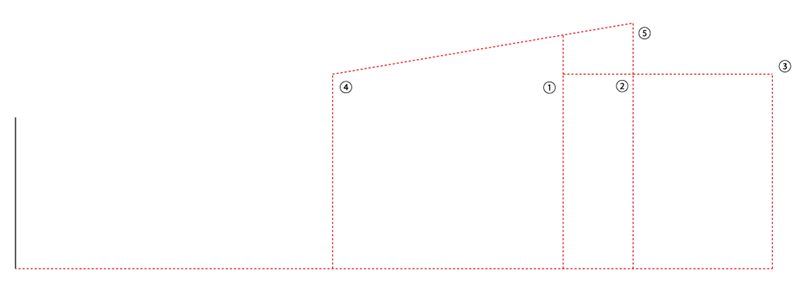
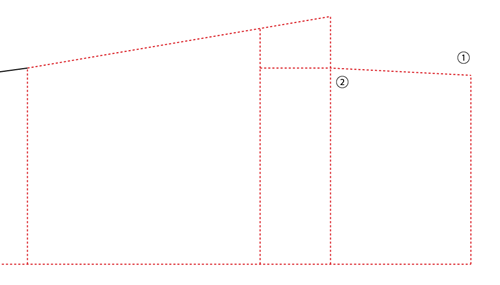
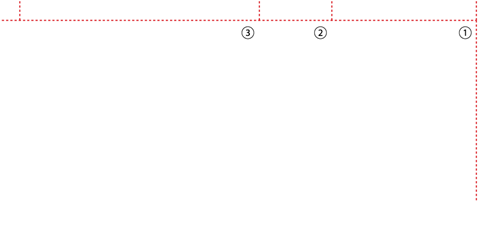
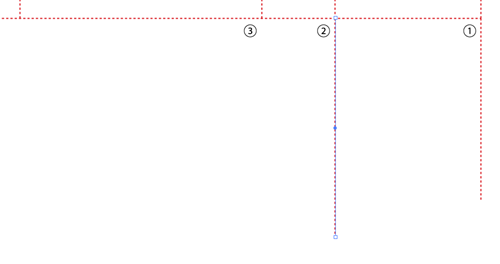
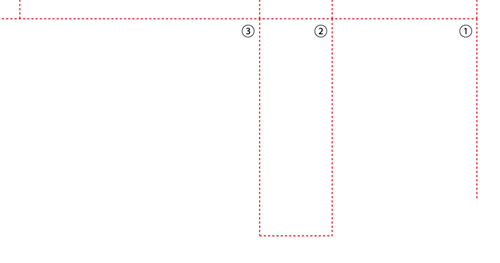
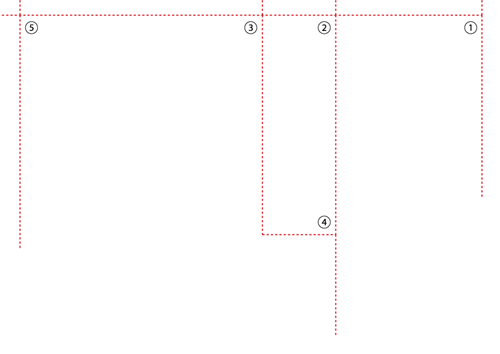
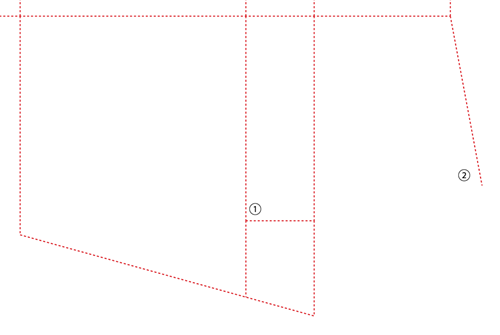
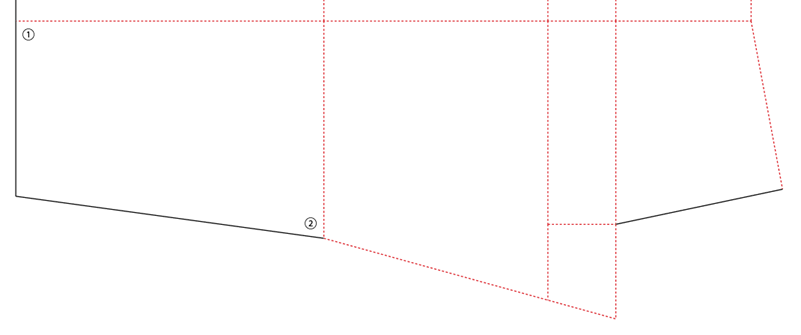
Step 12: The vertical construction line at 1: Click on the top anchor point and drag to the top anchor point of the vertical construction line at 2.
Step 13: Deselect (Ctrl-Shift-A).
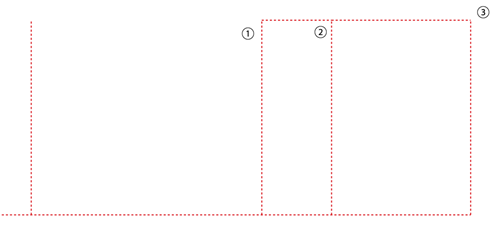
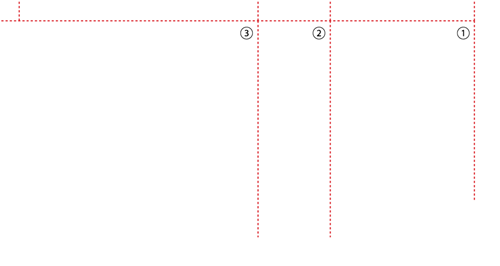
Step 14: On the corner point at 2: Click on the right anchor point of the vertical construction line that you just placed and drag to the top anchor point of the right vertical construction line at 3.
 Step 15: On the crossing at 2: Click on the anchor point and fill in:
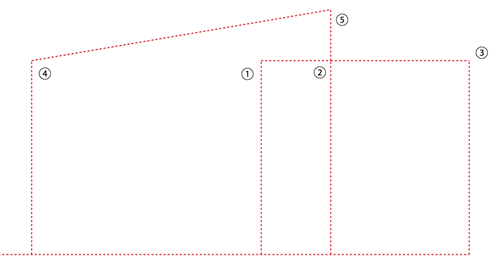
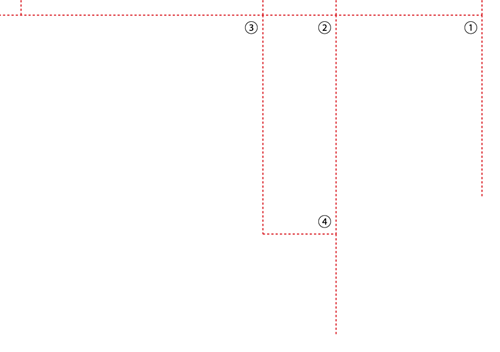
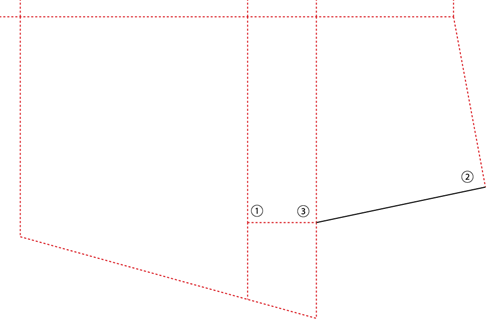
Step 16: The left vertical construction line at 4: Click on the top anchor point and drag to the top anchor point of the vertical construction line at 5.
Step 17: Deselect (Ctrl-Shift-A).
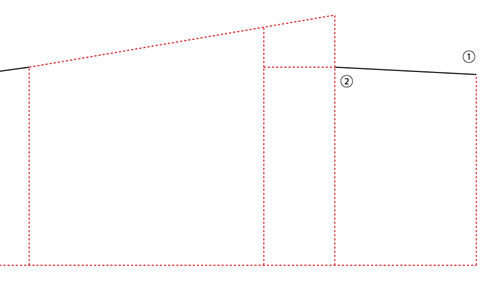
Step 18: On the corner point at 1: Click on the anchor point and drag to the top horizontal diagonal construction line.
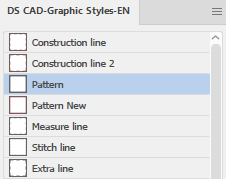 Step 19: Click in the panel called 'DS CAD-Graphic Styles-EN' on 'Pattern'.
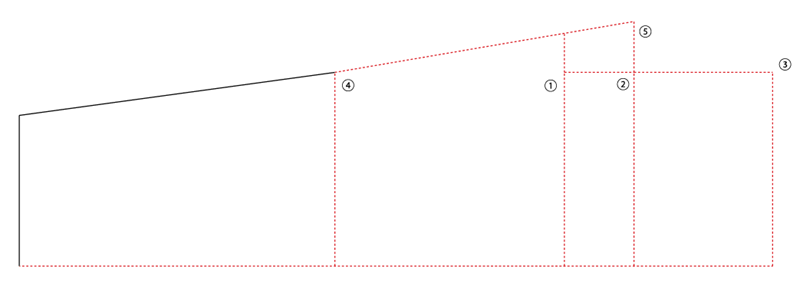
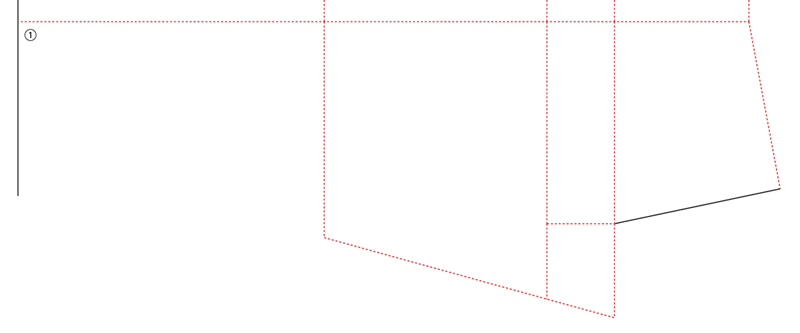
 Step 20: Click on the left anchor point of the long horizontal construction line and fill in:
Step 21: Click on the top anchor point of the left vertical black path and drag to the top anchor point of the vertical red construction line at 4.
Step 22: Activate the 'Direct Selection Tool' 
(A).
 Step 23: On the corner point at 3: Click and drag a mark over the anchor points to select them, then press 'Enter' and fill in:
Step 24: Click on the horizontal diagonal red construction line between 2 and 3 to select it.
Step 25: Click in the panel called 'DS CAD-Graphic Styles-EN' on 'Pattern'.
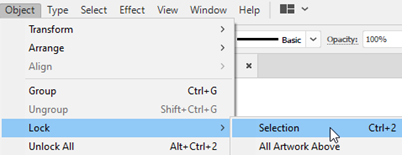 Step 26: Press 'Ctrl-A' to select all paths, then press 'Ctrl-2' to lock all selected paths.
Step 27: Activate the "Pen Tool" 
(P).
Step 28: Click in the panel called 'DS CAD-Graphic Styles-EN' on 'Pattern'.
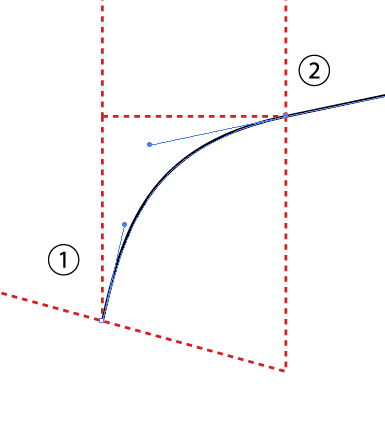
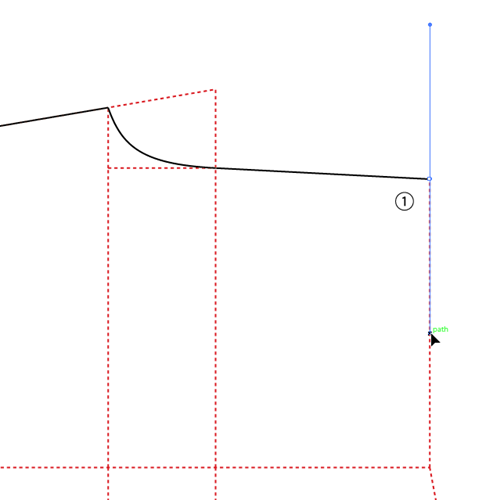
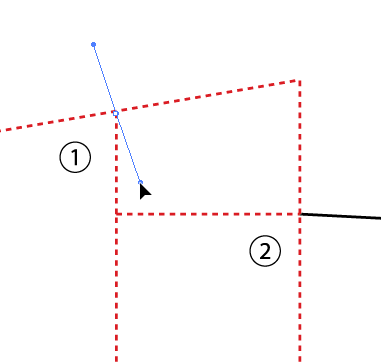 Step 29: To create the curve:
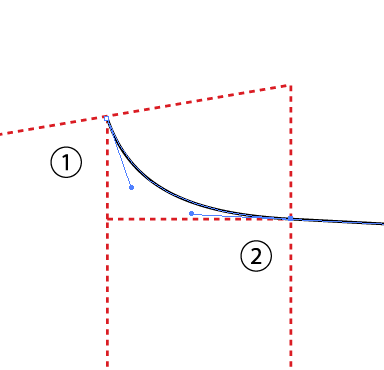
When you did not manage to create a nice curve the first time, press Ctrl-Z twice and try again.
Step 30: Press 'Ctrl-2' to lock the selected path.
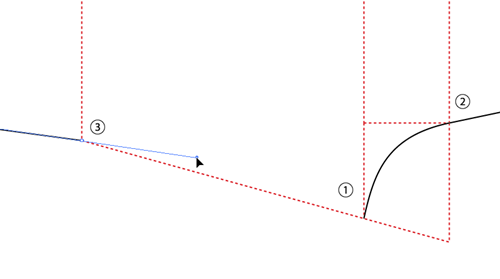
Step 31: To create the following path:
When you want to create a slightly curved path?

Step 32: Activate the 'Line Segment Tool' (/).
Step 33: Inside the panel "DS CAD-Paragraph Styles EN" click on 'Construction line'.
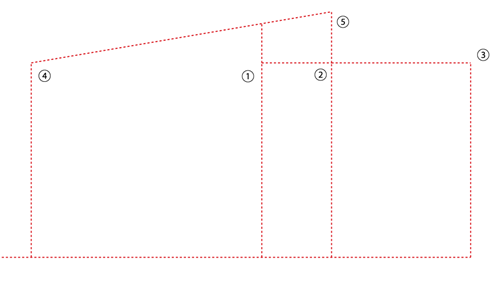
 Step 34: Right click on the right bottom corner point at 1 and fill in:
 Step 35: Click on the anchor point on the crossing at 2 and fill in:
Step 36: Click on the anchor point on the crossing at 3 and fill in:
Step 37: Click on the bottom anchor point of the vertical red construction line that you just placed and drag to the bottom anchor point of the right vertical red construction line.
 Step 38: on the corner point at 4: Click ont he right bottom anchor point and fill in:
 Step 39: On the crossing at 5: Click on the right bottom anchor point and fill in:
Step 40: Click on the bottom anchor point of the left vertical construction line at 1 that you just placed and drag to the right bottom anchor point of the vertical red construction line at 2.
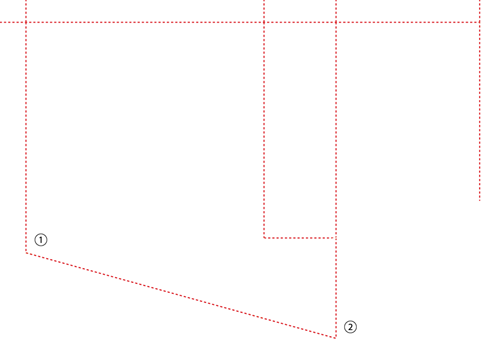
Step 41: On the corner point at 1: Click on the anchor point and drag to the bottom horizontal diagonal red construction line, then release the mouse.
Step 42: Activate the 'Direct Selection Tool' (A).
 Step 43: The right vertical red construction line at 2: Click on the bottom anchor point to select it, press 'Enter' and fill in:
Step 44: Activate the 'Line Segment Tool'  (/).
(/).
Step 45: Click in the panel called 'DS CAD-Graphic Styles-EN' on 'Pattern'.
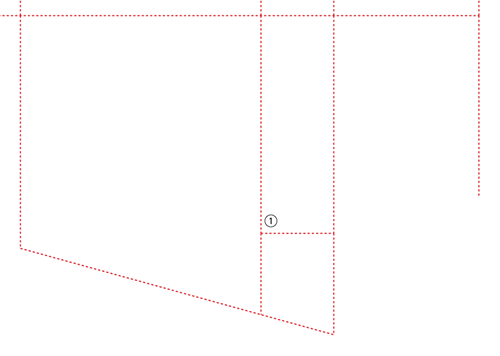
Step 46: On the crossing at 3: Click on the anchor point and drag to the bottom anchor point of the vertical diagonal red construction line at 2.
 Step 47: The long horizontal construction line at 1: Click on the left anchor point and fill in:
Step 48: Click on the bottom anchor point of the vertical black path that you just placed and drag to the bottom anchor point of the right vertical red construction line at 2.
Step 49: Press 'Ctrl-A' to select all paths, then press 'Ctrl-2' to lock all selected paths.
Step 50: Activate the "Pen Tool" (P).
Step 51: Click in the panel called 'DS CAD-Graphic Styles-EN' on 'Pattern'.
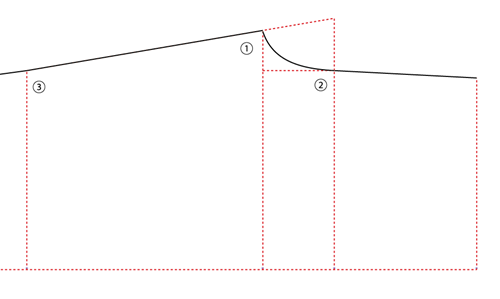
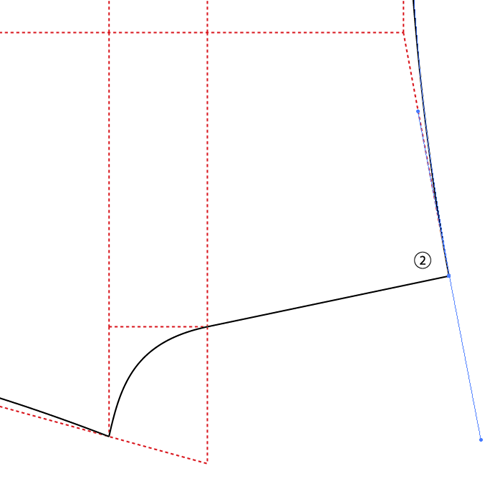
Step 52: To create this curve:

 Move the mouse to 2, click and drag a handle right upwards to create a curve, then release the mouse.
 When you did not manage to create a nice curve the first time, press Ctrl-Z twice and try again.
Step 53: Press 'Ctrl-2' to lock the selected paths.
Step 54: To create the following curve:
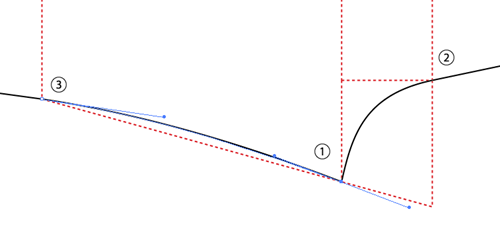
Step 55: To create the following curve:
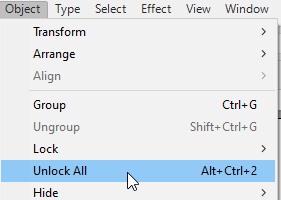 Step 56: On top of the screen choose 'Object - Unlock All (Alt+Ctrl+2).
Step 57: On top of the screen choose 'View > Fit Artboard in Window' (Ctrl+0).
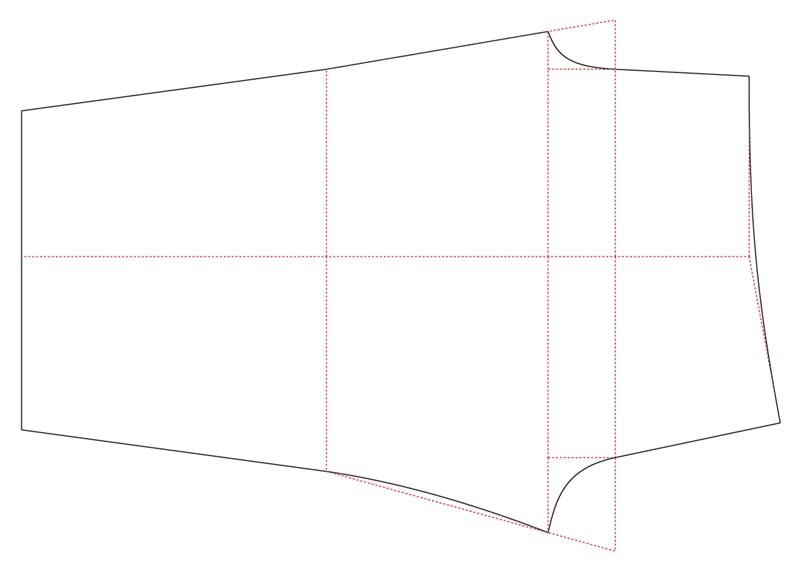
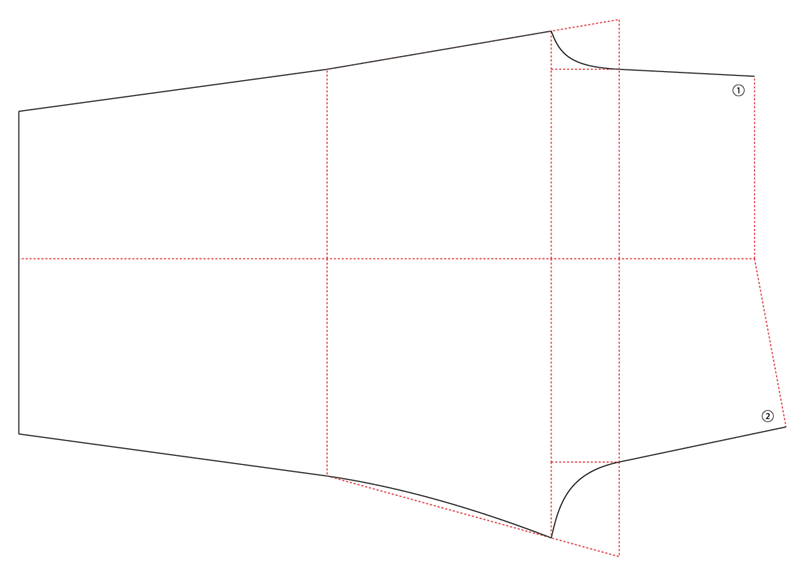
Congratulations! You just finished creating a basic pattern for a pyjama or jogging pants. You can adjust this base pattern to for instance a pattern with side seam and a slimmer or wider leg.
_____________________________________________
In deze tutorial wordt je uitgelegd hoe je een pyjama of een jogging broek kan tekenen.
Ga bovenaan naar "Bestand > Opslaan Als.." en bewaar het document. Schrijf op een papiertje (of in je fancy Android / Apple apparaat) bij welke stap je was gebleven en voorkom dat je de volgende keer moet gaan puzzelen!
Stap 1: Ga naar Bestand > Nieuw.
Vul in:
Wil je het beter kunnen zien:
Controleer of in het menu "Weergave" in de bovenbalk "Slimme hulplijnen" is aangevinkt. Met deze functie geactiveerd heb je een controle over meerdere handelingen die je hierna gaat verrichten.
Stap 2: Druk op de '\' om het gereedschap "Lijnsegment" te activeren.
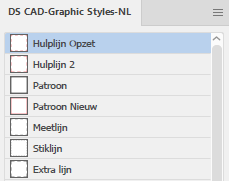 Stap 3: Klik met je muis bij "DS CAD-Graphic Styles-NL" op "Hulplijn Opzet".
Stap 4: Klik rechts in het midden op het tekengebied en vul in:
Stap 5: Klik op het linker ankerpunt van de horizontale opzetlijn en vul in:
Stap 6: Klik op het linker ankerpunt van de horizontale opzetlijn en vul in:
Stap 7: Klik op het rechter ankerpunt van de horizontale opzetlijn en vul in:
Stap 8: Druk op de 'Q' om het gereedschap "Groep selecteren" te activeren, druk op 'Enter' en vul in:
Stap 9: Druk op 'Enter' en vul in:
Stap 10: Klik op de linker verticale opzetlijn om deze lijn te selecteren, druk op 'Enter' en vul in:
Stap 11: Druk op de '/' om het gereedschap "Lijnsegment" te activeren.
Stap 12: De verticale opzetlijn bij 1: Klik op het bovenste ankerpunt en sleep met de muisknop ingedrukt naar het bovenste ankerpunt van de verticale opzetlijn bij 2.
Stap 13: Deselecteer (Ctrl-Shift-A).
Stap 14: Op het hoekpunt bij 2: Klik op het rechter ankerpunt van de verticale opzetlijn die je zojuist geplaatst hebt en sleep met de muisknop ingedrukt naar het bovenste ankerpunt van de rechter verticale opzetlijn bij 3.
Stap 15: Op de kruising bij 2: Klik op het ankerpunt en vul in:
Stap 16: De linker verticale opzetlijn bij 4: Klik op het bovenste ankerpunt en sleep met de muisknop ingedrukt naar het bovenste ankerpunt van de verticale opzetlijn bij 5.
Stap 17: Deselecteer (Ctrl-Shift-A).
Stap 18: Op het hoekpunt bij 1: Klik op het ankerpunt en sleep met de muisknop ingedrukt naar de bovenste horizontaal schuine opzetlijn en laat de muisknop los.
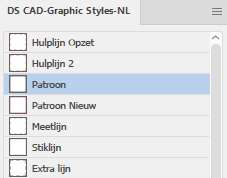 Stap 19: Klik met je muis bij "DS CAD-Graphic Styles-NL" op "Patroon".
Stap 20: Klik op het linker ankerpunt van de lange horizontale opzetlijn en vul in:
Stap 21: Klik op het bovenste ankerpunt van de linker verticale zwarte lijn en sleep met de muisknop ingedrukt naar het bovenste ankerpunt van de verticale rode opzetlijn bij 4.
Stap 22: Druk op de 'A' om het gereedschap "Direct Selecteren" te activeren.
Stap 23: Op het hoekpunt bij 3: Klik en sleep een rechthoek over de ankerpunten om te selecteren, druk op 'Enter' en vul in:
Stap 24: Klik op de horizontaal schuine rode opzetlijn tussen 2 en 3 om deze lijn te selecteren.
Stap 25: Klik met je muis bij "DS CAD-Graphic Styles-NL" op "Patroon".
Stap 26: Druk op de toetsen combinatie 'Ctrl-A' om alle lijnen te selecteren, druk dan op de toetsen combinatie 'Ctrl-2' om deze lijnen te vergrendelen.
Stap 27: Druk op de 'P' om het gereedschap "Pen" te activeren.
Stap 28: Klik met je muis bij "DS CAD-Graphic Styles NL" op "Patroon".
Stap 29: Om deze bocht te maken:
Lukt het niet gelijk een mooie ronding te maken maak dan de laatste bewerkingen ongedaan door twee keer (Ctrl-Z) in te drukken en probeer het opnieuw.
Stap 30: Druk op de toetsen combinatie 'Ctrl-2' om deze lijn te vergrendelen.
Stap 31: Om deze lijn te maken:
Wil je een licht gebogen lijn creëren?
Stap 32: Druk op de '\' om het gereedschap "Lijnsegment" te activeren.
Stap 33: Klik met je muis bij "DS CAD-Graphic Styles-NL" op "Hulplijn Opzet".
Stap 34: Klik op het rechts onder ankerpunt op het hoekpunt bij 1 en vul in:
Stap 35: Klik op het ankerpunt op de kruising bij 2 en vul in:
Stap 36: Klik op het ankerpunt op de kruising bij 3 en vul in:
Stap 37: Klik op het onderste ankerpunt van de verticale rode opzetlijn die je zojuist geplaatst hebt en sleep met de muisknop ingedrukt naar het onderste ankerpunt van de rechter verticale rode opzetlijn.
Stap 38: Op het hoekpunt bij 4: Klik op het rechts onder ankerpunt en vul in:
Stap 39: Op de kruising bij 5: Klik op het rechts onder ankerpunt en vul in:
Stap 40: Klik op het onderste ankerpunt van de linker verticale opzetlijn bij 1 die je zojuist geplaatst hebt en sleep met de muisknop ingedrukt naar het rechts onder ankerpunt van de verticale rode opzetlijn bij 2.
Stap 41: Op het hoekpunt bij 1: Klik op het ankerpunt en sleep met de muisknop ingedrukt naar de onderste horizontaal schuine rode opzetlijn en laat de muisknop los.
Stap 42: Druk op de 'A' om het gereedschap "Direct Selecteren" te activeren.
Stap 43: De rechter verticale rode opzetlijn bij 2: Klik op het onderste ankerpunt om te selecteren, druk op 'Enter' en vul in:
Stap 44: Druk op de '\' om het gereedschap "Lijnsegment" te activeren.
Stap 45: Klik met je muis bij "DS CAD-Graphic Styles-NL" op "Patroon".
Stap 46: Op de kruising bij 3: Klik op het ankerpunt en sleep met de muisknop ingedrukt naar het onderste ankerpunt van de verticaal schuine rode opzetlijn bij 2.
Stap 47: De lange horizontale opzetlijn bij 1: Klik op het linker ankerpunt en vul in:
Stap 48: Klik op het onderste ankerpunt van de verticale zwarte lijn die je zojuist geplaatst hebt en sleep met de muisknop ingedrukt naar het onderste ankerpunt van de rechter verticale rode opzetlijn bij 2.
Stap 49: Druk op de toetsen combinatie 'Ctrl-A' om alle lijnen te selecteren, druk dan op de toetsen combinatie 'Ctrl-2' om deze lijnen te vergrendelen.
Stap 50: Druk op de 'P' om het gereedschap "Pen" te activeren.
Stap 51: Klik met je muis bij "DS CAD-Graphic Styles NL" op "Patroon".
Stap 52: Om deze bocht te maken:
Klik op het ankerpunt op de kruising bij 1 en sleep een hendel naar rechts boven en laat de muisknop los.
Beweeg de muis naar 2, en klik en sleep een hendel naar rechts boven om de bocht te creëren en laat de muisknop los.Lukt het niet gelijk een mooie ronding te maken maak dan de laatste bewerkingen ongedaan door twee keer (Ctrl-Z) in te drukken en probeer het opnieuw.
Stap 53: Druk op de toetsen combinatie 'Ctrl-2' om deze lijn te vergrendelen.
Stap 54: Om deze bocht te maken:
Stap 55: Om deze bocht te maken:
Stap 56: Kies in de bovenbalk "Object - Alles ontgrendelen" (Alt+Ctrl+2).
Stap 57: Voer de sneltoets 'Ctrl-0' uit om het tekengebied weer passend in het beeldscherm te maken.
Gefeliciteerd! Je hebt het basispatroon voor een pyjama of jogging broek afgerond.
Op dit basispatroon kan je eventueel verder modelleren naar bijvoorbeeld een patroon met een zijnaad en een slanker of wijder been.