![]()

When designing a repeating pattern, you start creating a pattern swatch using the Pattern Tool. You end up with a pattern swatch inside the panel Swatches. You can use this swatch to fill parts of your style drawing. After that, you can use this pattern swatch to create one single tile on your artboard with dimensions. The manufacturer can use that for actual fabric printing. That is what you will learn in this tutorial.
![]()

This video takes 4 minutes...
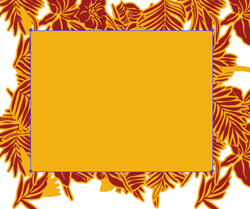
Step 1: Click on the yellow 'Ai' icon to download and open the Illustrator document.
There is no art on the artboard.
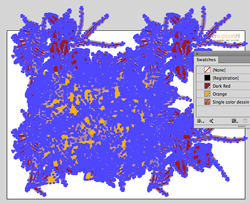
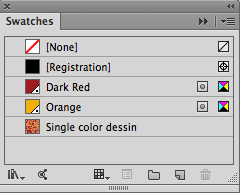 Step 2: Go to Window and open the Swatches panel.
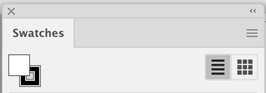
On the right top of the panel, click on the striped button to set 'Show List View'.
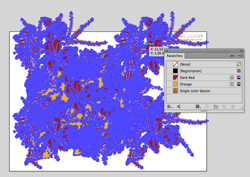 Step 3: Drag the swatch 'Single color dessin' on the artboard.
Step 4: Click next to the artwork to deselect (ctrl-shift-a).
Step 5: Go to 'View' and make sure 'Smart Guides' is active (ctrl-u).
Step 6: Activate the 'Group Selection Tool' (q).
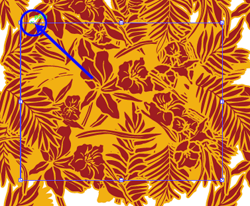 Step 7: Move the mouse over the artwork until the tile (rectangle) highlights, then click on it to select it.
When you do not manage to select the rectangle, you might want to zoom in a lot. If you are still not able to select it, press 'Ctrl-y'. Now you only see paths and no colors. This makes it even more easy to select the rectangle. Press 'Ctrl-y' again to return to view the colors again.
 Step 8: Press the 'F2' key to create a copy of the selected tile (rectangle).
Or if you did not install the 'DS Actions', press 'ctrl-c' following by 'ctrl-f' to copy the tile.
Step 9: Activate the 'Selection Tool' (v)  .
.
 Step 10: Select the artwork including the copied rectangle.
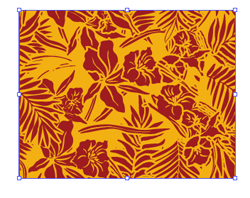 Step 11: Go to 'Object > Clipping Mask > Make' (ctrl-7).
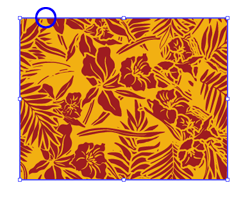
This is a perfect single tile for the manufacturer.
This is the moment when you need to give the tile the desired dimensions. And then you need to use the 'DS Dimensioning' script to let Illustrator write these dimensions around the tile as explanation for the manufacturer.
 Step 12: Press 'ctrl-r' to open the rulers.
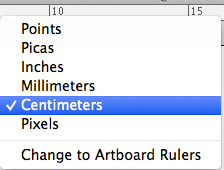 Step 13: Right click inside the rulers and choose 'Centimeters'.
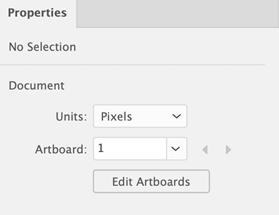
An alternative way is to click on the artboard to have nothing selected. Then inside the panel 'Properties', at 'Units', click on the little arrow button and choose 'Centimeters'.
Step 14: Select the artwork.
Step 15: Look inside the panel 'Properties' at 'Transform'.
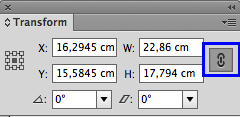 Step 16: Make sure the little chain button is active.
Step 17: In the field 'W:' type '23 cm', then press 'Enter'.
Step 18: Activate the 'Direct Selection Tool' (q).
Step 19: Click outside the artwork or 'Deselect' (ctrl-shift-a).
 Step 20: Click on the edge of the artwork to select the rectangle.
 Step 21: Go to File > Scripts > DS Dimensioning EN.
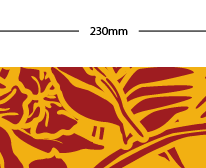
Illustrator will calculate the actual size dimensions and place them around the artwork automatically.
This is a designersupport.nl script, so you need to have installed this script. If you did'nt, follow this tutorial!
______________________________________________________
Tijdens het ontwerpen van een herhalend patroon (dessin), gebruik je het gereedschap 'Patroon' om uiteindelijk een patroonstaal te maken. Deze patroonstaal vind je terug in het venster 'Stalen'. Deze kan je gebruiken om vlakken van je stijl tekening te vullen. Daarna heb je één herhaling nodig voor de fabrikant. Met afmetingen er omheen. Die kan de fabrikant gebruiken om de stof mee te bedrukken. Dát is wat wij in deze oefening gaan doen.
![]()
Deze video duurt 4 minuten.
Stap 1: Klik op het gele 'Ai' icoon om het Illustrator document te downloaden en te openen in Illustrator.
Het tekengebied is leeg, dat is normaal.
Stap 2: Ga naar 'Venster' en open het venster 'Stalen'.
Klik rechts boven van dit venster op het gestreepte knopje 'Lijstweergave tonen'.
Stap 3: Sleep de staal 'Single color dessin' uit het venster 'Stalen' op het tekengebied.
Stap 4: Klik op wit deel van het tekengebied om te 'déselecteren' (ctrl-shift-a).
Stap 5: Ga naar Weergave en kijk of 'Slimme Hulplijnen' is aangevinkt, zo niet, klik er dan op (ctrl-u).
Stap 6: Activeer het gereedschap 'Groep selecteren' (q).
Stap 7: Beweeg de muis over het artwork todat je een rechthoek op ziet lichten. Probeer daar op te klikken om het te selecteren.
Stel dat dit niet lukt, dan kan je eventueel ver inzoomen om het nogmaals te proberen. Lukt dat ook niet? Doe dan de sneltoets 'ctrl-y'. Nu zie je alleen maar lijnen en geen kleur. Nu is het makkelijker om de rechthoek aan te klikken. Doe je opnieuw 'ctrl-y' dan heb je de kleuren weer terug.
Stap 8: Druk op 'F2' om een kopie van de rechthoek te maken. Die wordt bovenop geplaatst.
Als je geen 'DS Actions' hebt geïnstalleerd, doe dan 'ctrl-c' en dan 'ctrl-f'.
Stap 9: Activeer het gereedschap 'Selecteren' (v) .
Stap 10: Selecteer zowel het artwork als de gekopieerde rechthoek (dus eigenlijk alles).
Stap 11: Ga naar 'Object > Knipmasker > Maken (ctrl-7).
Nu heb je een perfect rapport (één herhaling) voor de fabrikant.
Nu dien je de afmetingen er omheen te plaatsen. Dit kan je automatisch doen met ons script 'ds-dimensioning'.
Stap 12: Druk op 'Ctrl-r' om de linialen te tonen.
Stap 13: Klik met de rechter muis knop binnen in de liniaal en kies: Centimeters.
Een andere manier is door eerst op het tekengebied te klikken zodat niks geselecteerd is. Dan zie je in het venster 'Eigenschappen' in de sectie 'Document', bij 'Eenheden' een klein pijltje. Klik daar op en kies 'Centimeters'.
Stap 14: Selecteer het artwork.
Stap 15: Kijk in het venster 'Eigenschappen' bij 'Transformeren'.
Stap 16: Het ketting icoontje moet actief zijn.
Stap 17: In het venster 'B:' plaats '23 cm', en druk op 'Enter'.
Stap 18: Activeer het gereedschap 'Direct selecteren' (q).
Stap 19: Klik in het witte gedeelte van het tekengebied om te déselecteren (ctrl-shift-a).
Stap 20: Klik op de rand van het artwork om de rechthoek te selecteren.
Stap 21: Ga bovenaan naar 'Bestand > Scripts > 'DS Dimensioning NL'.
Illustrator zal de exacte afmeting berekenen en om het artwork heen plaatsen.
Dit is een designersupport script. Die dien je zelf in een speciaal daar voor bestemde map van Illustrator te plaatsen. Klik hier om het script te downloaden en te lezen hoe en waar je het moet plaatsen.