![]()
 All objects show a small circle in it's corners. You can click and drag on that circle to convert a corner to a round corner. This feature is called 'Corner Widget'. When drawing patterns in Illustrator it might happen using the 'Direct Selection Tool' that you accidently click on the corner widget and create an unwanted round corner. Very innoiing. Fortunately, it is easy to toggle the corner widget on and off (View > Hide Corner Widget). So, by default we will switch the corner widget off. In some cases however, you can use the corner widget to create some fancy patterns. Let's see how this work
Stopping halfway the tutorial? Prevent to lose your work!
Go on top of the screen to 'File > Save' and save the document. Write on a piece of paper (or your mobile phone note app) at which step you stopped. This prevents having to puzzle the next time you continue with this tutorial.
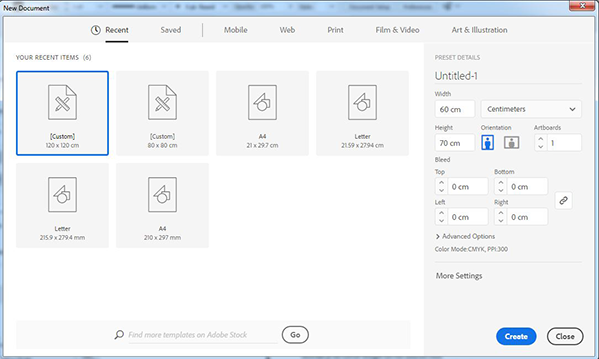
Step 1: Go to File > New.
Fill in:
Step 2: Activate the 'Rectangle Tool' ![]() (M).
(M).
 Step 3:Click in the panel called 'DS CAD-Graphic Styles-En' on 'Pattern'.
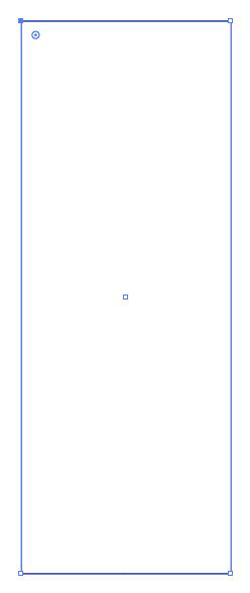
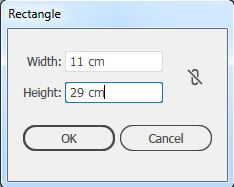 Step 4: Click on the left top of the artboard and fill in:
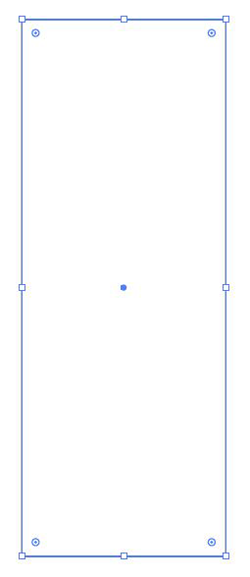
Each corner shows a small circle next to it. This is called the 'Corner widget'.
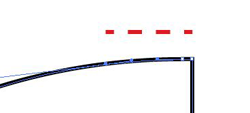
Step 5: Activate the 'Direct Selection Tool' ![]() (A).
(A).
 Step 6: Click on the anchor point in the left corner to select it.
Now, only the left corner shows the corner widget circle.
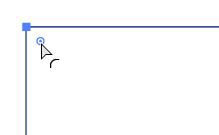
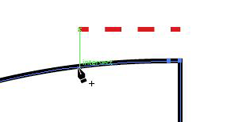
 Step 7: Move the mouse to the corner widget circle, do not click on it.
The mouse cursor now shows a small curve icon. This means that when you click and drag on it, the corner will convert to a round corner.
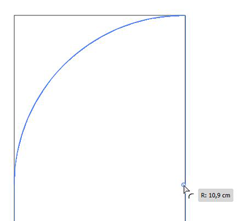
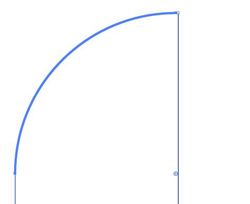
 Step 8: Click on the corner widget, hold the mouse and drag right downwards. Just before you reach the right vertical path, release the mouse.
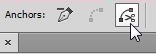
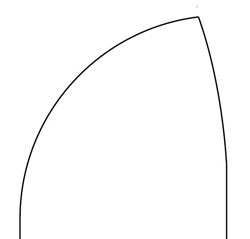
You converted one corner to a round corner.
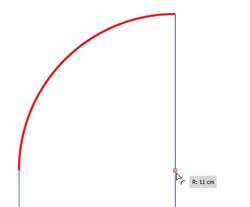
When the curved path turns red, drag the mouse a bit back left upwards until it turns blue again, then release the mouse.
 Step 9: Press 'Ctrl-Shift-A' to 'Deselect'.
Step 10: Activate the 'Line Segment Tool' ![]() (\).
(\).
 Step 11: Click in the panel called 'DS CAD-Graphic Styles-En' on 'Construction line'.
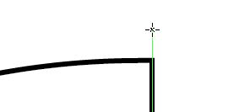
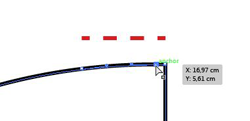
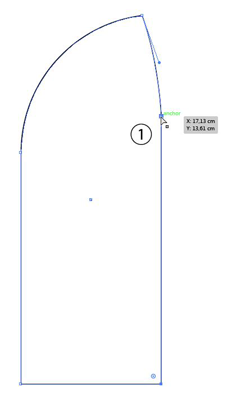
 Step 12: Move the mouse to the right vertical path until the path highlights by 'Smart Guides'. Move the mouse until the 'Smart Guides' shows a verticle line, then click a bit above the black path in the white artboard area. Then fill in:
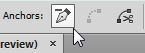
Step 13: Activate the "Group Selection Tool" ![]() (Q) and click on the curved black path to select it.
(Q) and click on the curved black path to select it.
Step 14: Activate the "Pen Tool" ![]() (P).
(P).
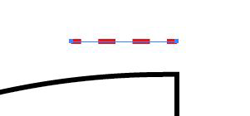
 Step 15: Move the mouse over the curved black path until 'Smart Guides' highlight vertically from the left anchor point from the horizontal red guide. Then, click on the black path to add an anchor point.
When a path is selected, and you move the Pen Tool above that path, the pen cursor shows a small '+' sign. This means that when you click on the path, a new anchor point is added to the path.
Step 16: Keep the anchor point selected.
Step 17: In the panel 'Properties', click on the button 'Scissors' to cut the path in two.
Stap 18: Activate the 'Direct Selection Tool' ![]() (A).
(A).
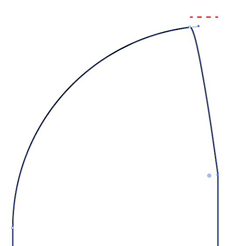
 Step 19: On the curved path, click on the anchor point a bit left from the right corner anchor point.
Step 20: In the panel 'Properties', click on the button 'Remove selected anchor points'.
 Step 21: On the corner, click on the right top anchor point, press 'Enter' and fill in:
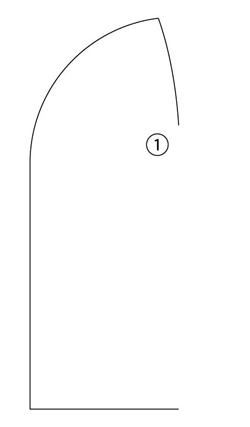
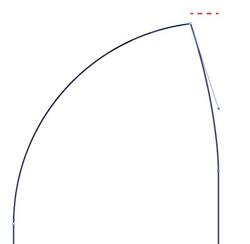 Step 22: Click on the handle of the right top anchor point and drag it right to create a curved path.
 Step 23: Click on the red guide path, and remove it by pressing 'Backspace' twice.
Step 24: On the corner, click on the right bottom anchor point, press and hold 'Shift' and click on the right anchor point at 1 to add it to the selection.
Step 25: In the panel 'Properties', click on the button 'Scissors' to cut the path in two.
Step 26: Deselect (Ctrl-Shift-A).
 Step 27: Click between the cut through anchor points on the right verticle black path and remove it by pressing 'Backspace' twice.
Step 28: Click and drag over all black paths to select them.
Step 29: Press and hold the 'Rotate Tool' and choose the 'Reflect Tool'  (O).
(O).
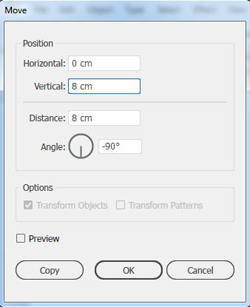
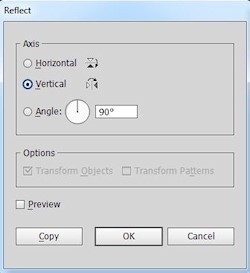 Step 30: Press and hold 'Alt', then click on the bottom black path's right anchor point. A panel opens.
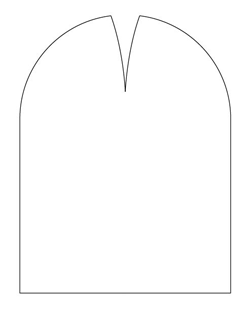
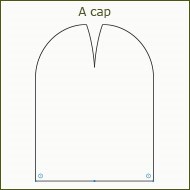
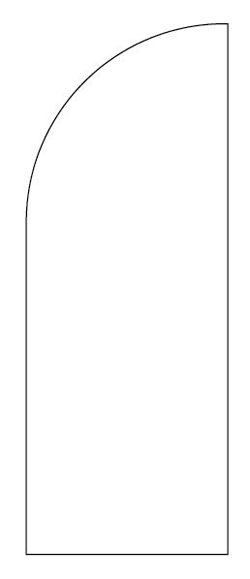
Enjoy your new cap!
To hide the corner widget
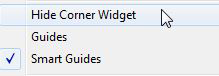 Step 31: On top of the screen choose 'View > Hide Corner Widget'.
____________________________________________________
Alle vormen hebben een klein rondje in de hoek waar je op kan klikken en slepen om zo van een hoek een ronding te maken. Tijdens het patroontekenen, wanneer je met het gereedschap 'Direct selecteren' werkt (witte pijl), dan kan het gebeuren dat je onbedoeld de actieve hoek versleept. Daarom zitten deze 'actieve hoeken' met patroontekenen regelmatig in de weg. Gelukkig kan je deze 'actieve hoeken' eenvoudig aan en uitschakelen (Weergave > Widget Hoeken verbergen). Maar je kan er ook leuke dingen mee doen. Zoals een patroon voor een warme muts en/of van een modisch stofje maken. In deze nieuwe korte tutorial leer je hoe je de functie optimaal kan benutten.
Tussentijds stoppen? Voorkom verlies van je werk!
Ga bovenaan naar "Bestand > Opslaan Als.." en bewaar het document. Schrijf op een papiertje (of in je fancy Android / Apple apparaat) bij welke stap je was gebleven en voorkom dat je de volgende keer moet gaan puzzelen!
Stap 1: Ga naar Bestand > Nieuw.
Vul in:
De muts
Stap 2: Activeer het gereedschap "Rechthoek" ![]() (M).
(M).

Stap 3: Klik met je muis bij "DS CAD-Graphic Styles NL" op "Patroon".
Stap 4: Klik links bovenin op het tekengebied en vul in:
Je ziet nu dat iets naast elk hoekpunt van de rechthoek een circeltje staat met een punt in het midden. Dit is de "widget Actieve hoeken".
Stap 5: Activeer het gereedschap "Direct selecteren" ![]() (A).
(A).
Stap 6: Klik op het links boven ankerpunt van de rechthoek om dit hoekpunt te selecteren.
Nu is alleen naast het links boven hoekpunt die je zojuist geselecteerd hebt het "Actieve hoeken" rondje zichtbaar.
Stap 7: Beweeg je naar muis naar de "widget Actieve hoeken" zonder te klikken.
Je ziet dat er een gebogen lijntje bij de Direct select cursor komt te staan. Dat betekent dat als je de "widget Actieve hoeken" verplaatst, de bijbehorende hoek gewijzigd wordt naar een afgeronde hoek.
Stap 8: Klik nu op de "widget Actieve hoeken", sleep met de muisknop ingedrukt naar rechts onder en laat iets voor de rechter verticale lijn de muisknop los.
Je hebt nu één hoek van de geplaatste rechthoek gewijzigd naar een afgeronde hoek.
Wordt de gebogen lijn van de afgeronde hoek rood gemarkeerd, sleep de muis dan iets naar links boven totdat de gebogen lijn weer blauw gemarkeerd is. Laat dan de muisknop los.
Stap 9: Gebruik je toetsenbord en toets de combinatie in: (Ctrl-Shift-A) om te 'deselecteren'.
Stap 10: Activeer het gereedschap "Lijnsegment" ![]() (\).
(\).
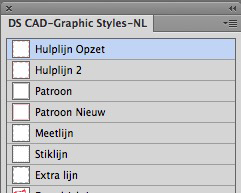
Stap 11: Klik met je muis bij " DS CAD-Graphic Styles NL" op "Hulplijn Opzet".
Stap 12: Beweeg je muis naar de rechter verticale lijn totdat de lijn oplicht door "Slimme hulplijnen". Beweeg dan je muis met de richting van "Slimme hulplijnen" mee naar boven en klik iets boven de zwarte lijn in het wit op het tekengebied en vul in:
Stap 13: Activeer het gereedschap "Groep selecteren" ![]() (Q) en klik op de gebogen zwarte lijn om te selecteren.
(Q) en klik op de gebogen zwarte lijn om te selecteren.
Stap 14: Activeer het gereedschap "Pen" ![]() (P).
(P).
Stap 15: Beweeg je muis over de gebogen zwarte lijn totdat "Slimme hulplijnen" verticaal oplichten vanaf het linker ankerpunt van de horizontale rode hulplijn. Klik dan op de zwarte lijn om een ankerpunt toe te voegen.
Als een lijn is geselecteerd, en je gaat er met de het gereedschap Pen boven hangen, dan komt er een plusje bij de Pen cursor te staan. Dat betekent dat wanneer je op de lijn klikt, dat er automatisch een ankerpunt wordt toegevoegd.
Stap 16: Laat het ankerpunt geselecteerd.
Stap 17: Kies in de bovenbalk, of in het venster 'Eigenschappen' de knop het "Schaartje" om de lijn door te knippen.
Stap 18: Activeer het gereedschap "Direct selecteren" ![]() (A).
(A).
Stap 19: Klik op het ankerpunt op de gebogen zwarte lijn iets links van het rechts boven hoekpunt om te selecteren.
Stap 20: Kies in de bovenbalk, of in het venster 'Eigenschappen' de knop "Verwijder geselecteerde ankerpunten".
Stap 21: Op het hoekpunt, klik op het rechts boven ankerpunt, druk op 'Enter' en vul in:
Stap 22: Klik op de handle van het rechts boven ankerpunt en draai de handle naar rechts onder om een gebogen lijn te creëren.
Stap 23: Klik op het rode hulplijntje en verwijder dit lijntje door twee keer de 'Backspace' toets in te drukken. Dit lijntje is nu niet meer nodig.
Stap 24: Op het hoekpunt, klik op het rechts onder ankerpunt om te selecteren, houd de 'Shift' toets ingedrukt en klik op het rechter ankerpunt bij 1 om aan de selectie toe te voegen.
Stap 25: Kies in de bovenbalk, of in het venster 'Eigenschappen' de knop het "Schaartje" om de lijn op twee plaatsen door te knippen.
Stap 26: Deselecteer (Ctrl-Shift-A).
Stap 27: Klik tussen de twee doorgeknipte ankerpunten op de rechter verticale zwarte lijn en verwijder deze lijn door twee keer de 'Backspace' toets in te drukken. Deze lijn is nu niet meer nodig.
Stap 28: Selecteer alle zwarte lijnen door met de muisknop ingedrukt een rechthoek over de lijnen te slepen.
Stap 29: Houd het gereedschap "Roteren" ingedrukt en kies dan het gereedschap "Spiegelen" ![]() (O).
(O).
Stap 30: Houd de 'Alt' toets ingedrukt, klik op het rechter ankerpunt van de onderste zwarte lijn, een venster wordt geopend:
Veel plezier met je nieuwe muts!
Om de widget Actieve hoeken te verbergen
Stap 31: Kies uit de bovenbalk "Weergave - Widget Hoeken verbergen" en klik om de Actieve hoeken te deactiveren.