![]()
Vector drawings are basically lines (paths) with a stroke color and fill color applied to it. Each time you open a vector drawing, the computer calculates the coordinates of:
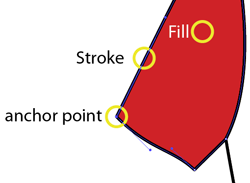
Each time you scale a drawing larger or smaller, the computer recalculates all these values and coordinates. That's why a vector drawing is always sharp.
This video takes 4,2 minutes.
Step 1: Click on the yellow 'Ai' icon to download the Illustrator document and open it in Illustrator.
Step 2: Activate the 'Zoom Tool' (z)  .
.
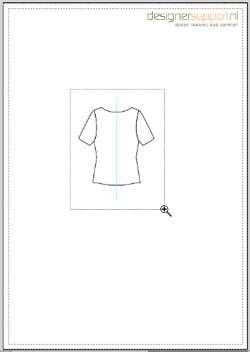 Step 3: Drag a 'Mark' around the shirt and realease the mouse button.
Step 4: Activate the 'Selection Tool' (v)  .
.
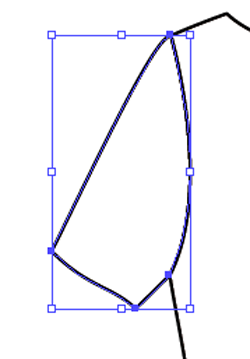 Step 5: Click on the path of the body or sleeve to select it.
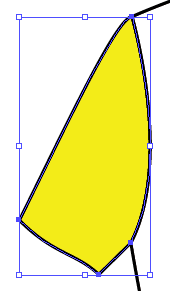 Step 6: When an object is selected, Inside the panel 'Properties', Illustrator shows a section called 'Appearance'.
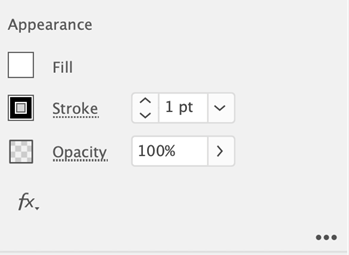
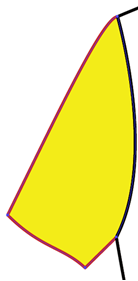 Step 7: To apply a color to the stroke:
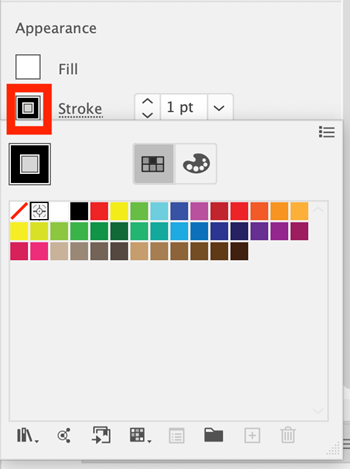

Step 8: Below the 'Tools panel' on the left, there are two color picker icons. One for the stroke and one for the fill.
Step 9: To change one of these colors, doubleclick on the 'stroke' color picker or the 'fill' color picker.
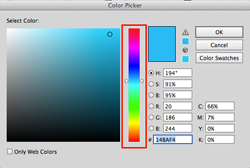 Step 10: Click inside the center color slider on the small vertical color bar to choose the base color.
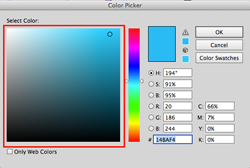 Step 11: Then click and drag inside the left box called 'Select Color:' to choose the desired color tint. Then click 'OK'.
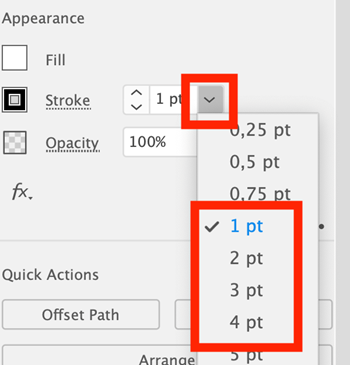 Step 12: Traditionally, the stroke width is mentioned in 'Points' (pt). When a single object is selected using the 'Selection Tool' (v)
  , the panel 'Properties' show the the stroke settings. Click on the down arrow icon right from '1 pt'. Then choose a larger or smaller stroke width.
---------------------------------------------------------
![]()
Vector tekeningen zijn in basis lijnen (paden) met een lijn kleur met daar een kleur vulling aan toegevoegd. Elke keer dat je een vector tekening opent zal de computen de coördinaten uitrekenen van :

Elke keer dat je een tekening groter of kleiner maakt (van schaal veranderd) zal de computer al deze waardes en coördinaten herberekenen. Dit verklaart waarom een vector tekening altijd scherp is.
Deze video duurt 4,2 minuten.
Stap 1: Klik op het gele Ai icoon om het Illustrator document te openen in Illustrator.
Stap 2: Activeer het gereedschap 'Zoomen' (z)  .
.
 Stap 3: Sleep het zoom kader om het shirt heen en laat de muisknop los.
Stap 4: Activeer het gereedschap 'Selectie' (v)  .
.
 Stap 5: Klik op het object (de body of de mouw) om het te selecteren.
 Stap 6: Wanneer een object is geselecteerd dan verschijnt in het venster 'Eigenschappen' een sectie genaamd 'Vormgeving'.

 Stap 7: Een kleur toepassen op de lijn:
 De kleuren die je te zien krijgt, zijn de kleuren die opgeslagen zijn in het document.

Stap 8: Onder het 'Gereedschappen venster' links, zie je twee 'kleurkiezers'. Eén voor de lijn (Stroke) en één voor de vulling (Fill).
Stap 9: Om één van deze kleuren te veranderen, dubbelklik op de 'lijn' kleurkiezer of op de 'vulling' kleurkiezer.
 Stap 10: Het venster 'Kleurkiezer' komt te voorschijn. Klik altijd eerst in het midden van de verticale kleuren balk om de basiskleur te kiezen.
 Stap 11: Vervolgens klik en sleep je binnen de linker box genaamd 'Kleur selecteren:' om de gewenste kleur te kiezen. Klik vervolgens op 'OK'.
 Stap 12 : Traditioneel gezien wordt een lijn dikte weergegeven in 'punten' (pt). Wanneer een object is geselecteerd met het gereedschap 'Selectie' (v)
  , zie je in het venster 'Eigenschappen', bij 'Vormgeving' de specificaties van de lijn. Rechts van '1 pt', Klik op het rechter neerwaardse pijl icoon om een dikkere of dunnere lijn te kiezen.