This video takes five minutes.
Step 1: Click on the yellow 'Ai' icon to download the Illustrator document 'pattern swatch.ai' and open it in Illustrator.
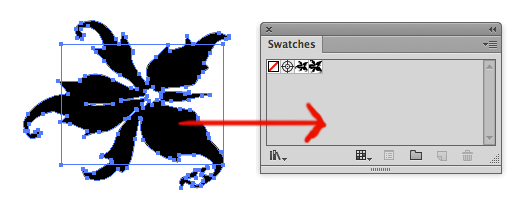
Step 2: It is possible to drag objects inside the Swatches panel. The swatch you create this way is called a 'pattern swatch'.
Step 3: Go to Window and open the panel called 'Swatches'.
Step 4: Select the flower and drag it inside the Swatches panel.
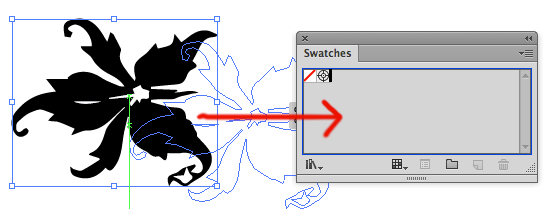
Step 5:
 and drag a large rectangle.
  . Thsi means that 'Fill Color' should be on top. You can press the 'x' key to toggle between fill and stroke color.
The artwork will repeat inside the rectangle.
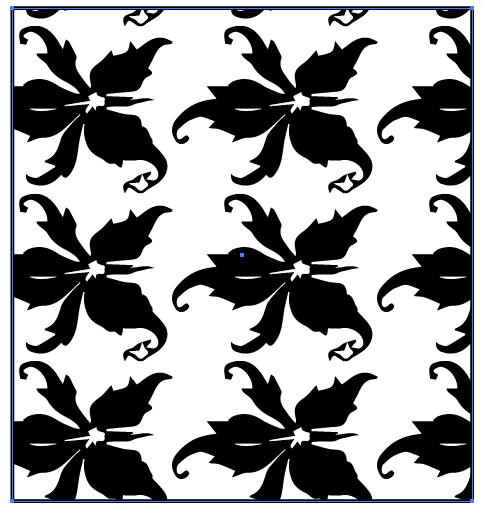
Step 6: Go back to the original artwork. Drag a small rectangle over it like I did. Illustrator calls the edge of the pattern the 'tile'. We will create a 'tile' from this rectangle.
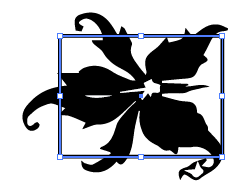
Step 7: Set both the Fill and Stroke to 'None' (the bounding box will have no fill and no stroke).

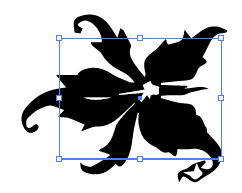
Step 8: Go on top of the screen to 'Object > Arrange > Send to Back'. The rectangle will determine the edge of the pattarn (tile). To be able to create a tile from the rectangle, it must:

Step 9: Select both the flower artwork and the rectangle and drag them inside the swatches panel.
Step 10: Create another large rectangle and click on the new pattern swatch you created.
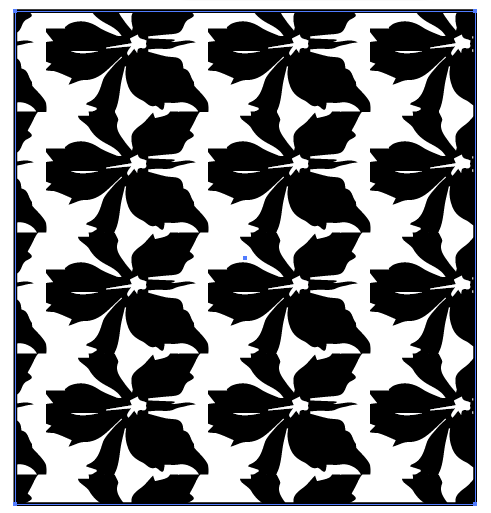
Everything outside the bounding box is not visible. Illustrator used the rectangle as the pattern border. That's why we call it the 'tile'.
How did this happen? When you drag an object inside the swatches panel, Illustrator starts examinating the object and asks itself:
Is there a rectangle at the bottom? .... Yes.... Does this rectangle have no fill and no stroke? Yes.... OK, in that case I consider it as the edge of the pattern swatch (tile).
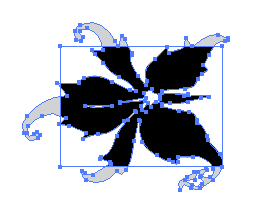
The pattern swatch we just created does not repeats seamlessly yet. We offer tutorial pages how to create tiling patterns that repeat seamlessly.
_______________________________________________
![]()
Deze video duurt vijf minuten.
Stap 1: Klik op het gele 'Ai' icoontje om het Illustrator oefendocument 'pattern swatch.ai' te downloaden en te openen in Illustrator.
Stap 2: Het is mogelijk om een stukje tekening in het venster stalen te slepen. Je hoeft deze niet eerst te groeperen. Wanneer een pad wordt gevult met deze staal, dan herhaalt het stukje tekening zich in die vulling. Daarom noemen wij het een patroonstaal.
Stap 3: Ga naar 'Venster' en open het venster 'Stalen'.
Stap 4: Selecteer de zwarte bloem en sleep het in het venster 'Stalen.

Stap 5:
 en klik en sleep een rechthoek op het tekengebied.
 (zorg dat vulkleur boven is en niet lijnkleur). Je kan op de 'x' toets drukken om te wisselen.
De bloem van de patroonstaal herhaald zich automatisch in het vlak.

Stap 6: Even terug naar het originele bloemetje. Klik en sleep een kleine rechthoek over de bloem. De grens van het patroon noemen wij een 'tegel'. Wij gaan van dit rechthoekje de 'tegel' maken.

Stap 7: Zet zowel vulling als lijn op 'Geen' (schuine rode streep). De rechthoek mag beslist geen vulling en geen lijn hebben.


Stap 8: Ga bovenaan naar 'Object > Ordenen > Naar Achtergrond'. Om van de rechthoek een 'tegel' te maken die de grens van het patroon gaat bepalen moet de tegel:

Stap 9: Selecteer zowel de bloem als de rechthoek en sleep ze samen in het venster 'Stalen'.

Stap 10: Teken nog een rechthoek en vul deze met de nieuwe patroonstaal.

Alles buiten de rechthoek is genegeerd. De rechthoek geeft de grens van het patroon aan. Daarom het die rechthoek in dit geval de 'tegel'.
Hoe kan dit? Wanneer je een stuk tekening samen met een rechthoek in het venster stalen sleept, dan gaat Illustrator kijken:
Zit er een rechthoek helemaal onderop? Ja..... Heeft die rechthoek geen vulling en geen lijn? Ja..... OK, dan bepaal ik dat de rechthoek de grens van het patroon is.
Om handmatig de grens van het rapport te bepalen moet je dus aan die voorwaarden voldoen.

OK, deze patroonstaal herhaald zichzelf niet naadloos. Dit was alleen nog maar even de uitleg wat een 'tegel' is. In andere tutorials zal je leren om een naadloos herhalend patroon te maken in Illustrator.